Scan and sign a document on your iPhone
A document needs your signature. In ExplainThisDoc, you can finish the job where your paperwork already lives: in your own archive. Scan the paper or import the file, sign in the reader and share the finished PDF. Save yourself printing, signing on paper and scanning it again.
1. Bring the document into your archive
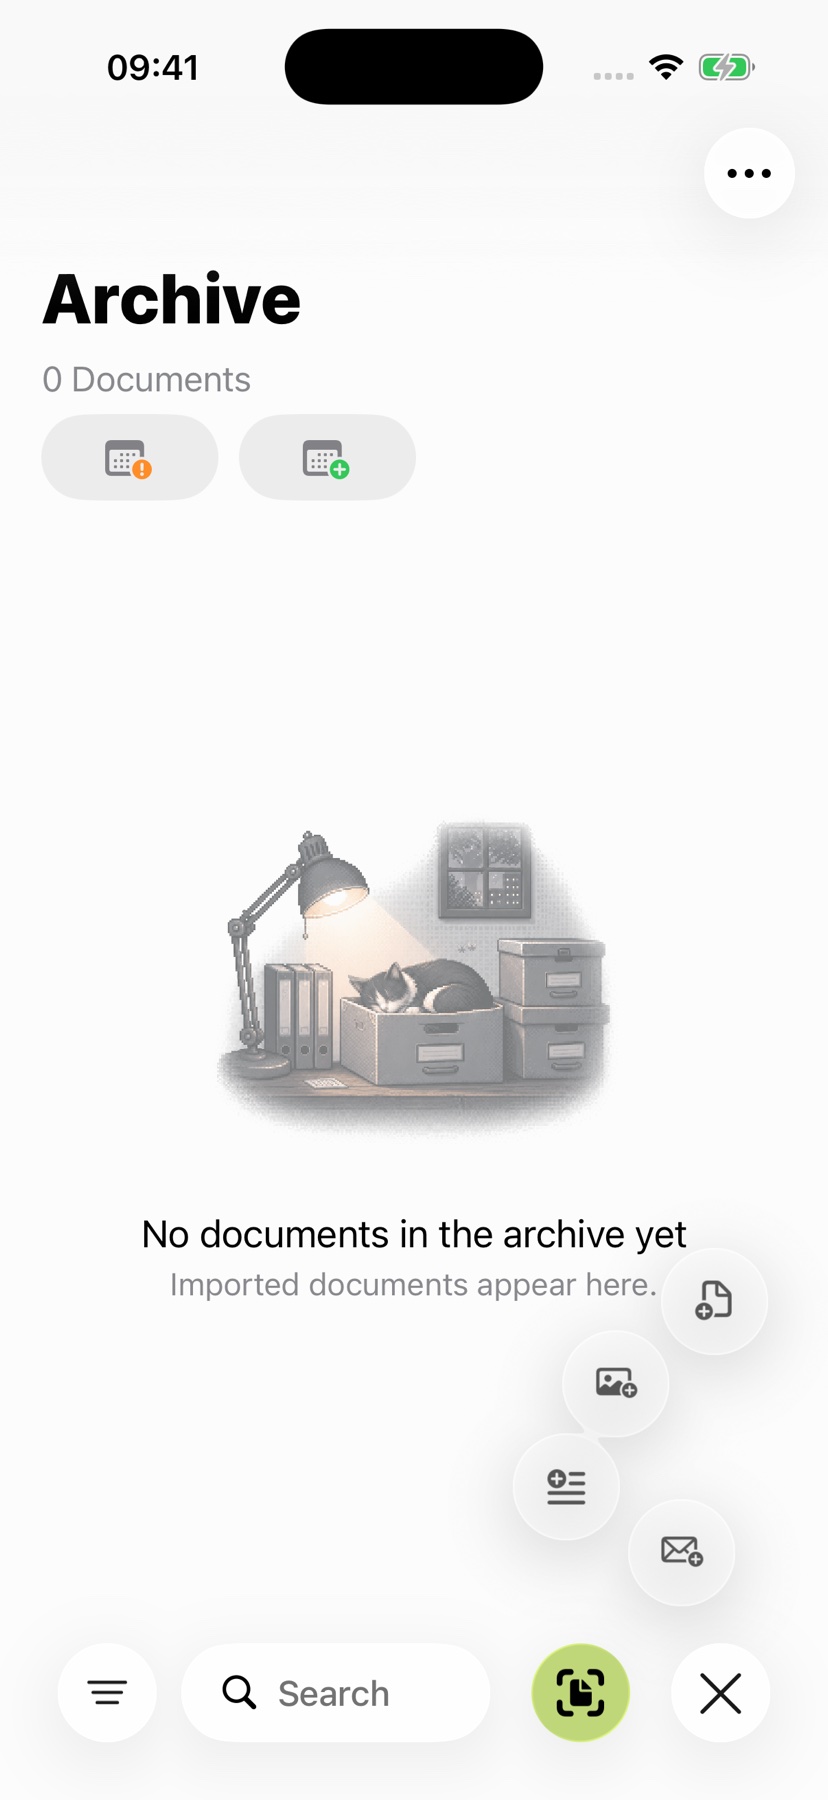
Tap “Scan” in the archive to capture paper with the camera. For a document with several pages, capture its pages together. The app adds the scan to your archive and recognizes its text.
For paperwork you already have, open “+” in the archive and choose “Import photo” or “Import file”. Bring in a document photo or PDF and continue working with it. The ExplainThisDoc setup guide helps with your first settings.
2. Open the right page in the reader
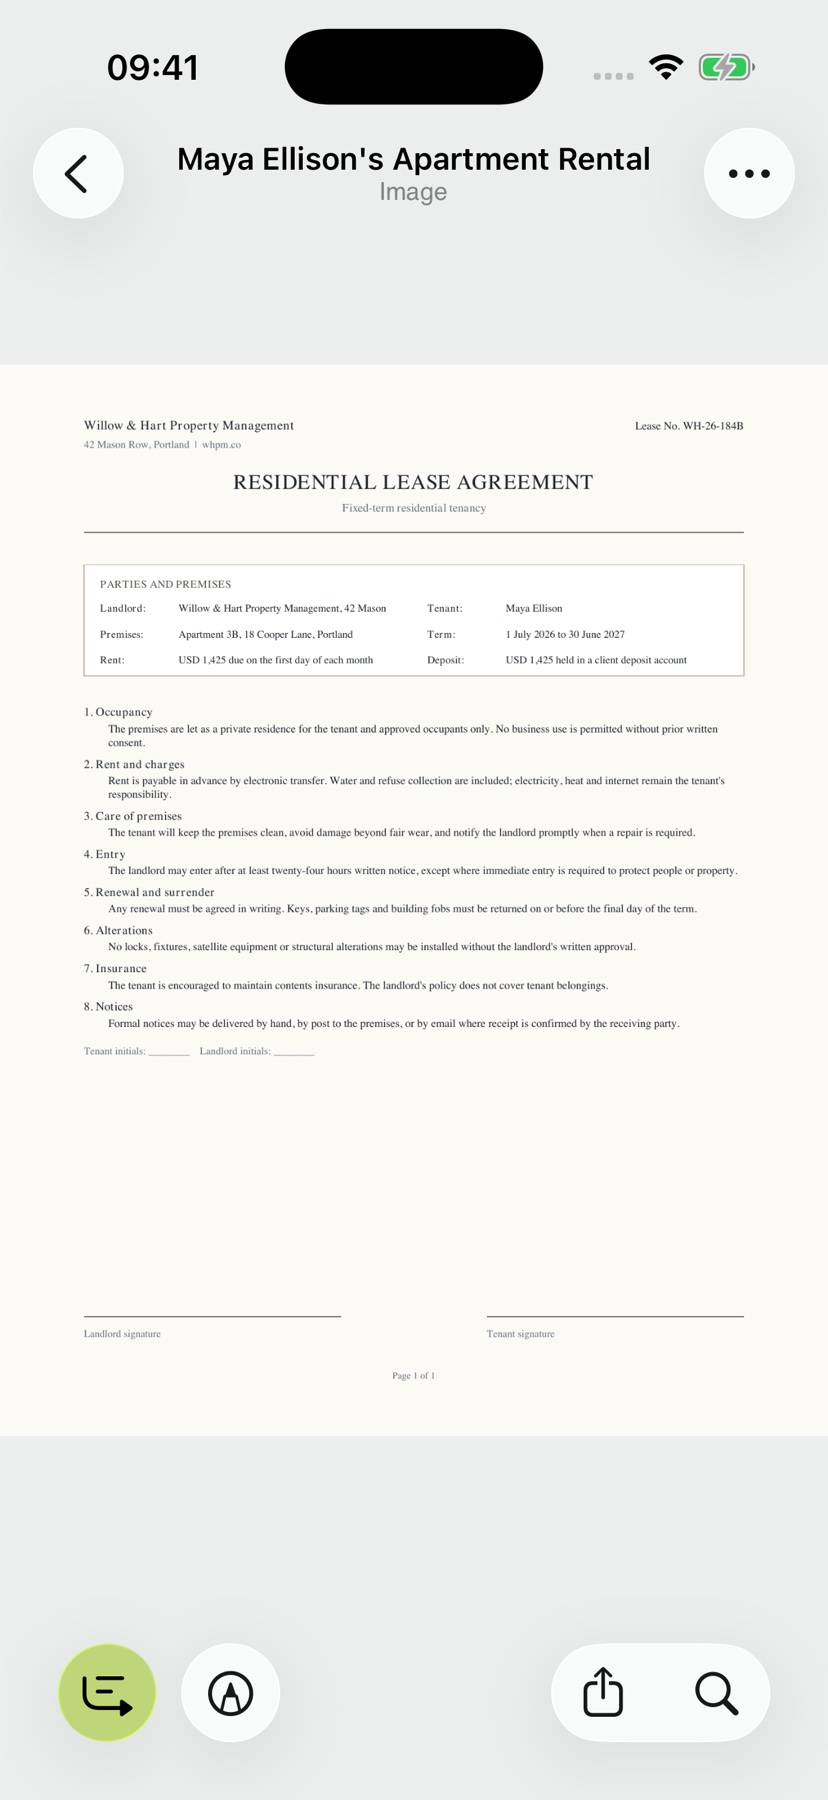
Open the document from your archive and go to the original in the reader. Turn to the page with the signature field. In a longer document, text search helps you find the right passage, including in a scan.
Read the relevant wording on the page. Comments and highlights are available in the same reader when you want to leave a question or mark a paragraph before signing.
3. Choose “Add signature”
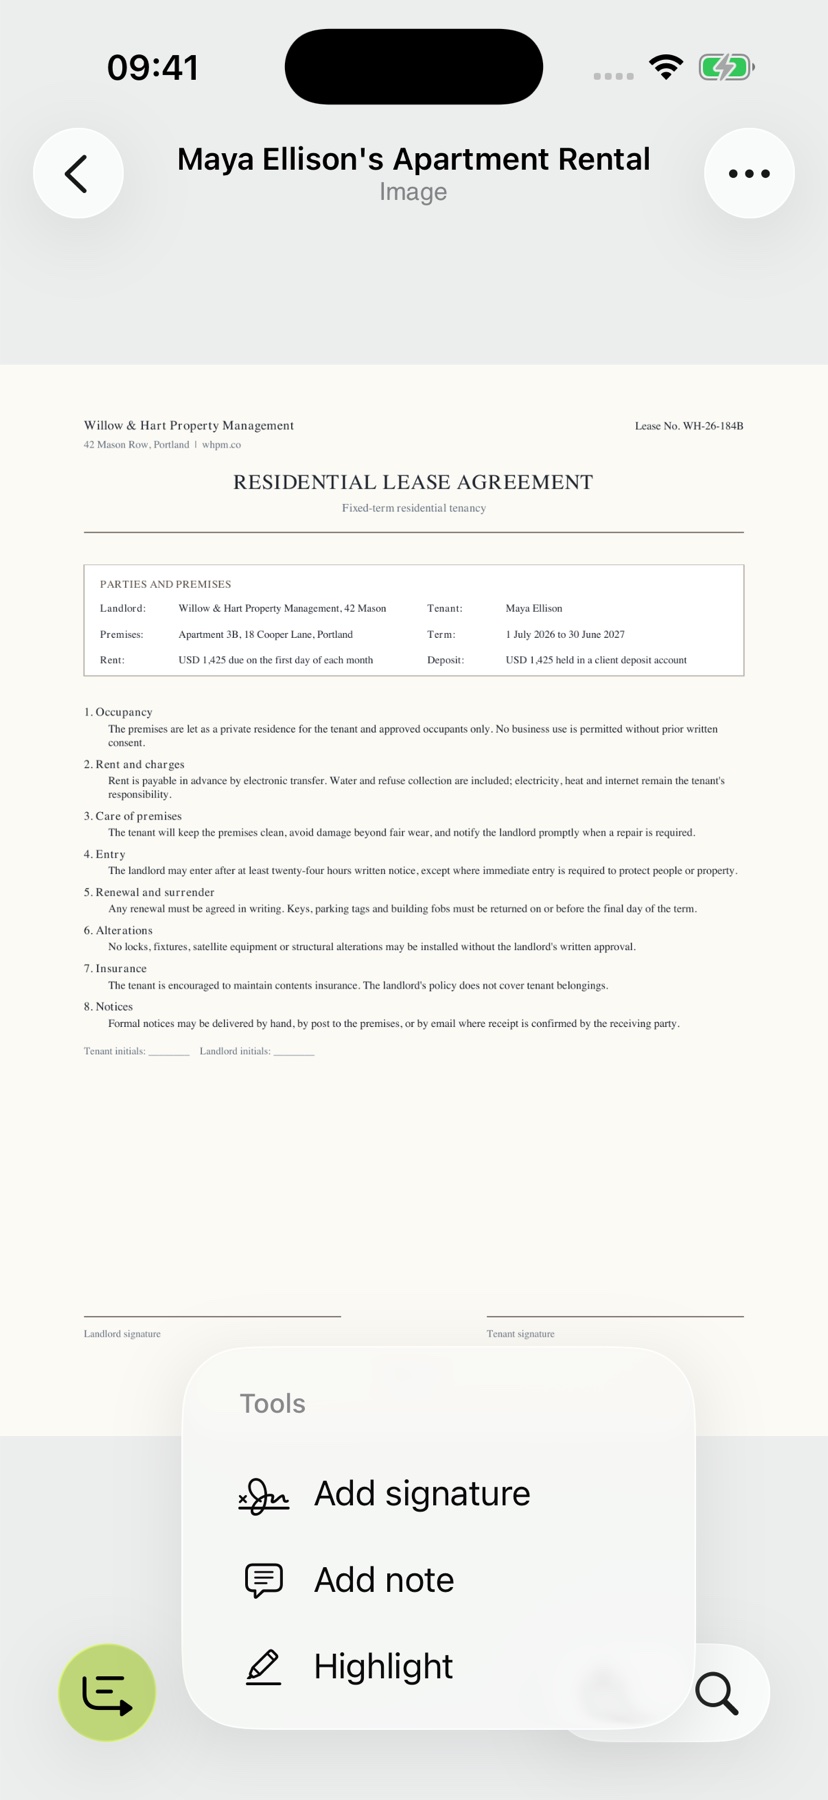
Open “Tools” in the reader and choose “Add signature”. This opens the drawing area for your signature.
You stay with the document throughout the process. Prepare your signature in the app, then place it on the page you have open.
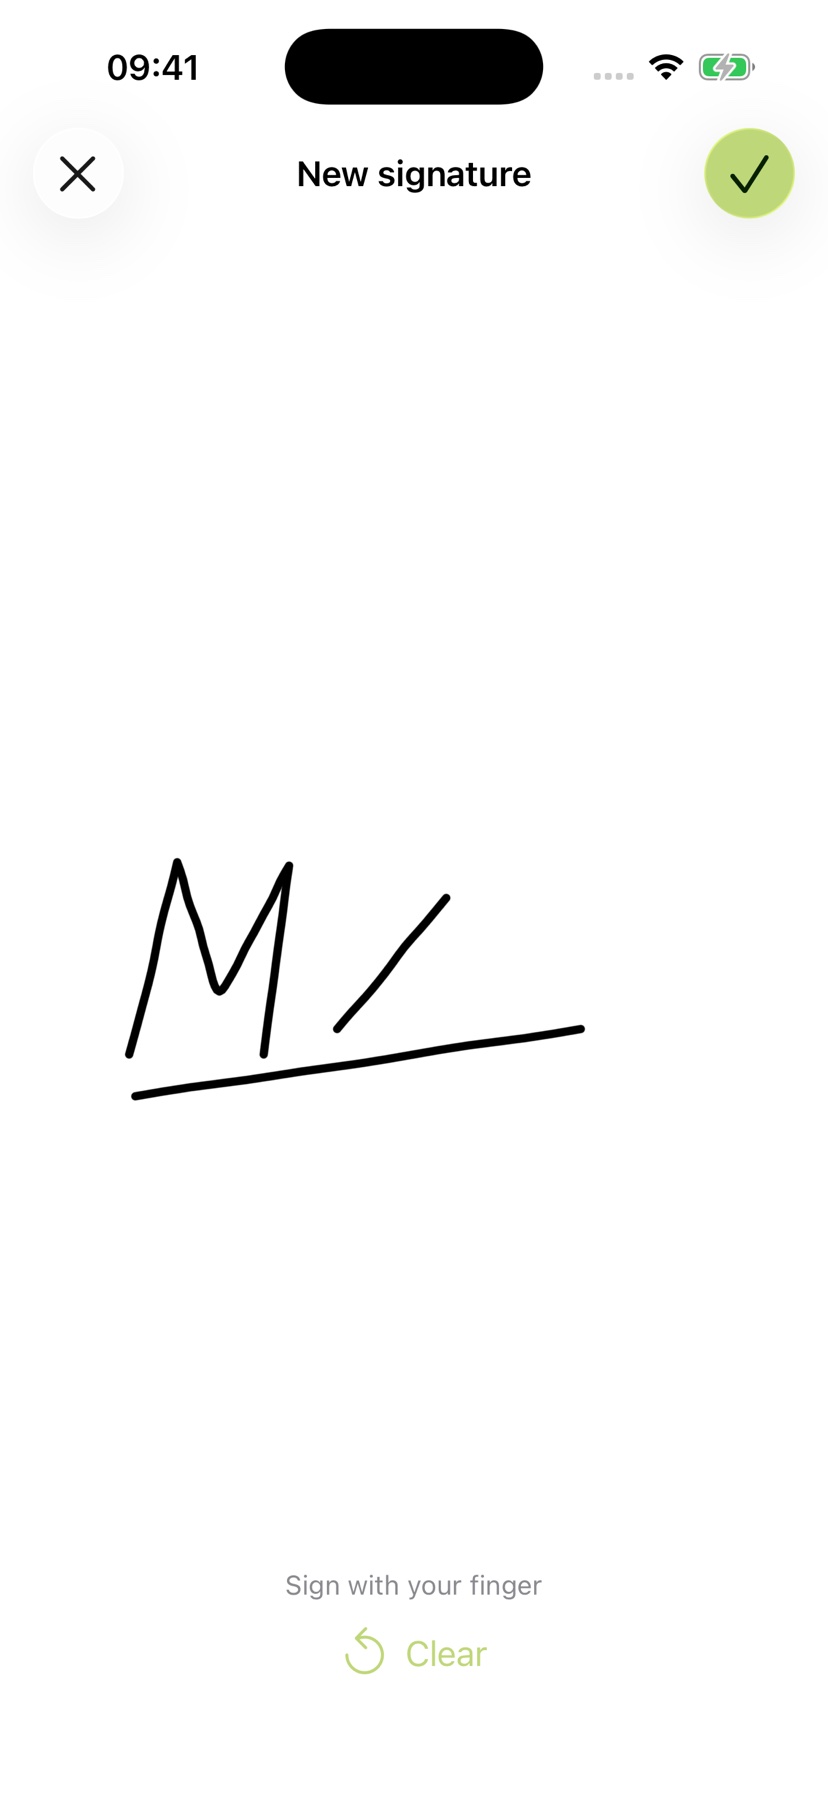
4. Sign with your finger
Draw your signature on the canvas with your finger. When it is ready, confirm using the checkmark (“Done”) at the top right.
The app places the drawing on the visible document page. In the next step, fit it to the intended signature field.
5. Put the signature in place
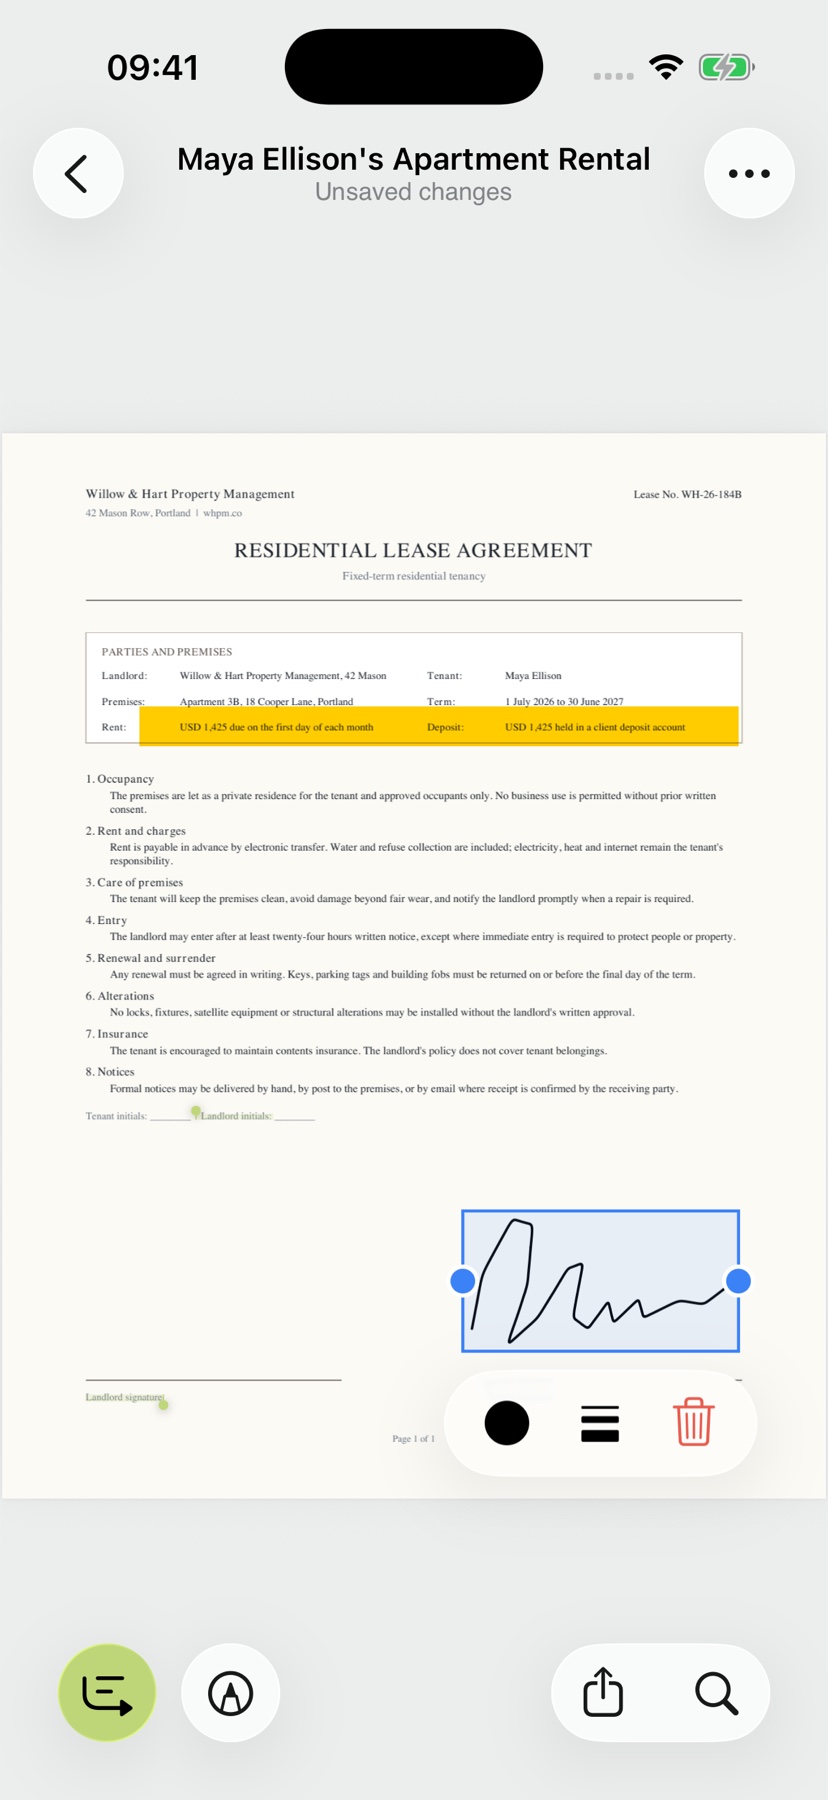
Drag the selected signature into the signature field. Use two fingers to resize it. Fit it to the right place on the page.
Keep working on the original document. Add a highlight or note from Tools when needed. The guide to signatures, comments and highlights covers the other reader tools.
6. Keep the edited document in your archive
Use Back or Share in the Reader to save changes. If a save error appears, saving has not completed successfully. Reopen the PDF and check the signature’s page, position and size, together with your annotations.